Anatomy of a Photo: The Boat on the Lake
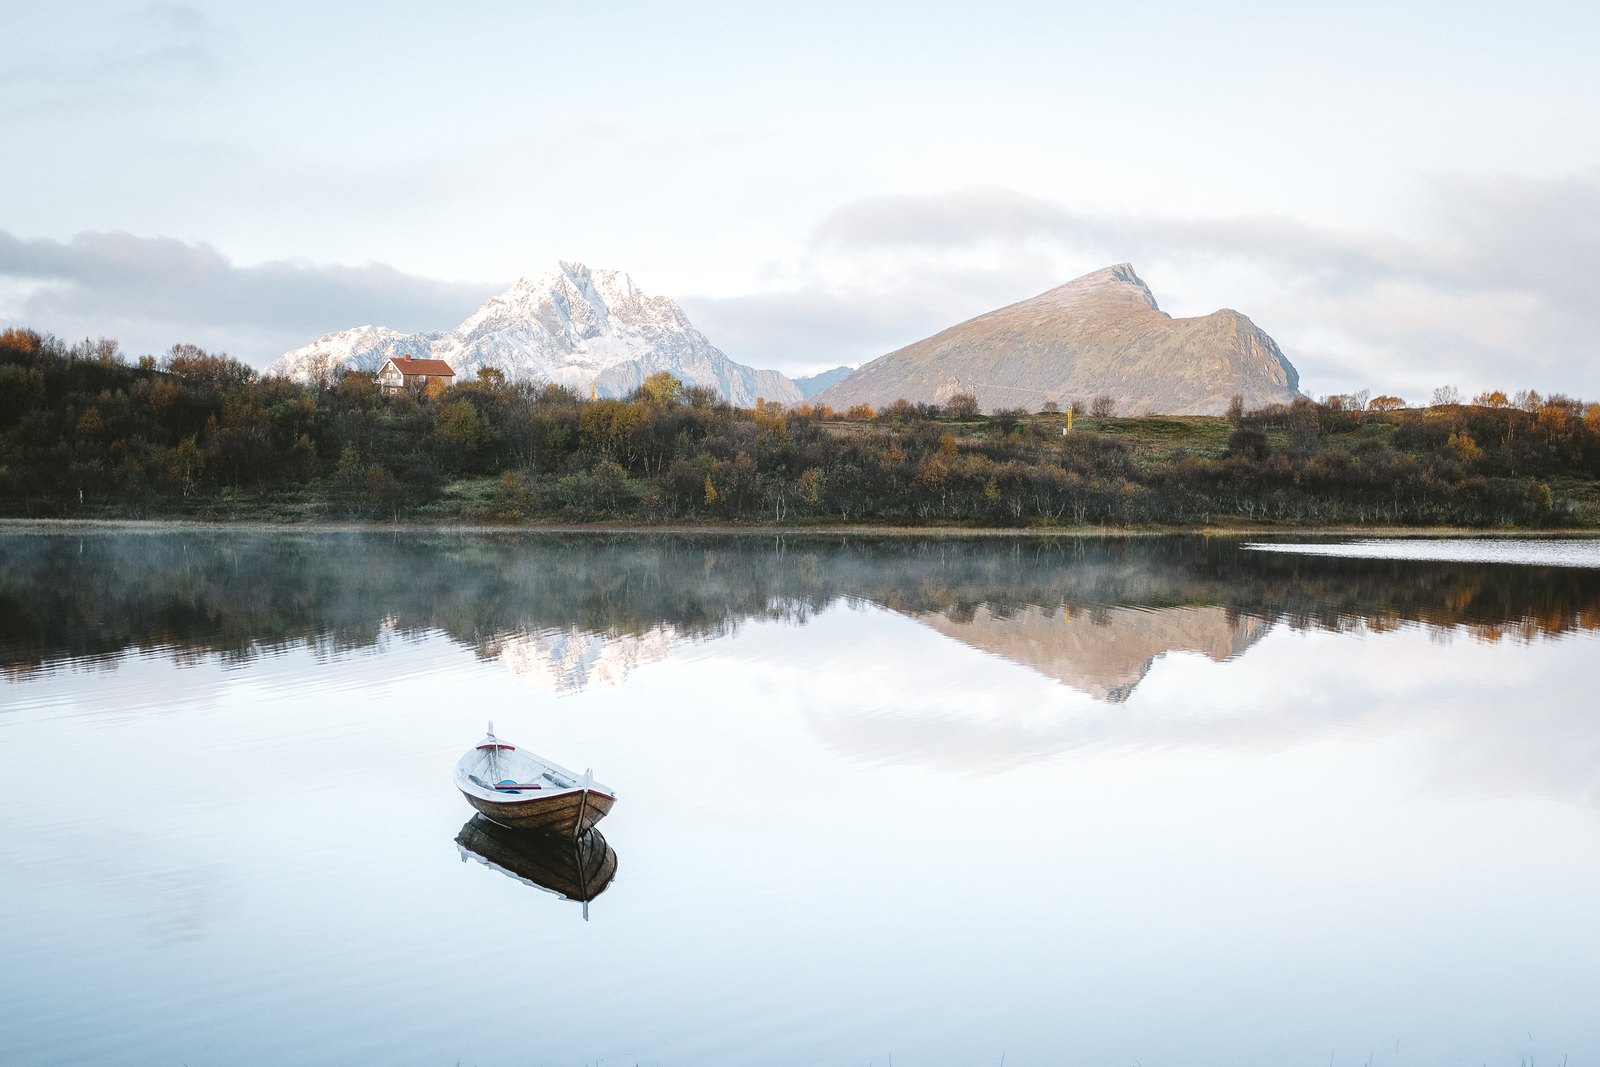
2 October 2024, 8:36 in the morning. A small lake, not a breath of wind, a thin layer of mist floating on the water and a lonely wooden rowing boat. I only took a few frames — this post is about one of them, and everything that happened to it between the camera and the final image.
Location and light
Locations: Lofoten
The photo was taken on the Lofoten Islands in northern Norway, at the edge of a small lake beside the road. Early October is a wonderful time here: the birches are turning orange, the first snow is already on the peaks, and the mornings are often completely still.
The sun was still low. Its first light was already touching the mountain tops, while the lake and the shore stayed in soft shade under a thin layer of cloud. The cold night left mist on the water, and the calm surface turned the lake into a mirror. This is the kind of light you can't create later — you can only be there for it.
- Camera: Fujifilm X-H1
- Lens: XF 35mm F2 (≈ 53 mm full-frame equivalent)
- f/2 · 1/2000 s · ISO 400
Composition
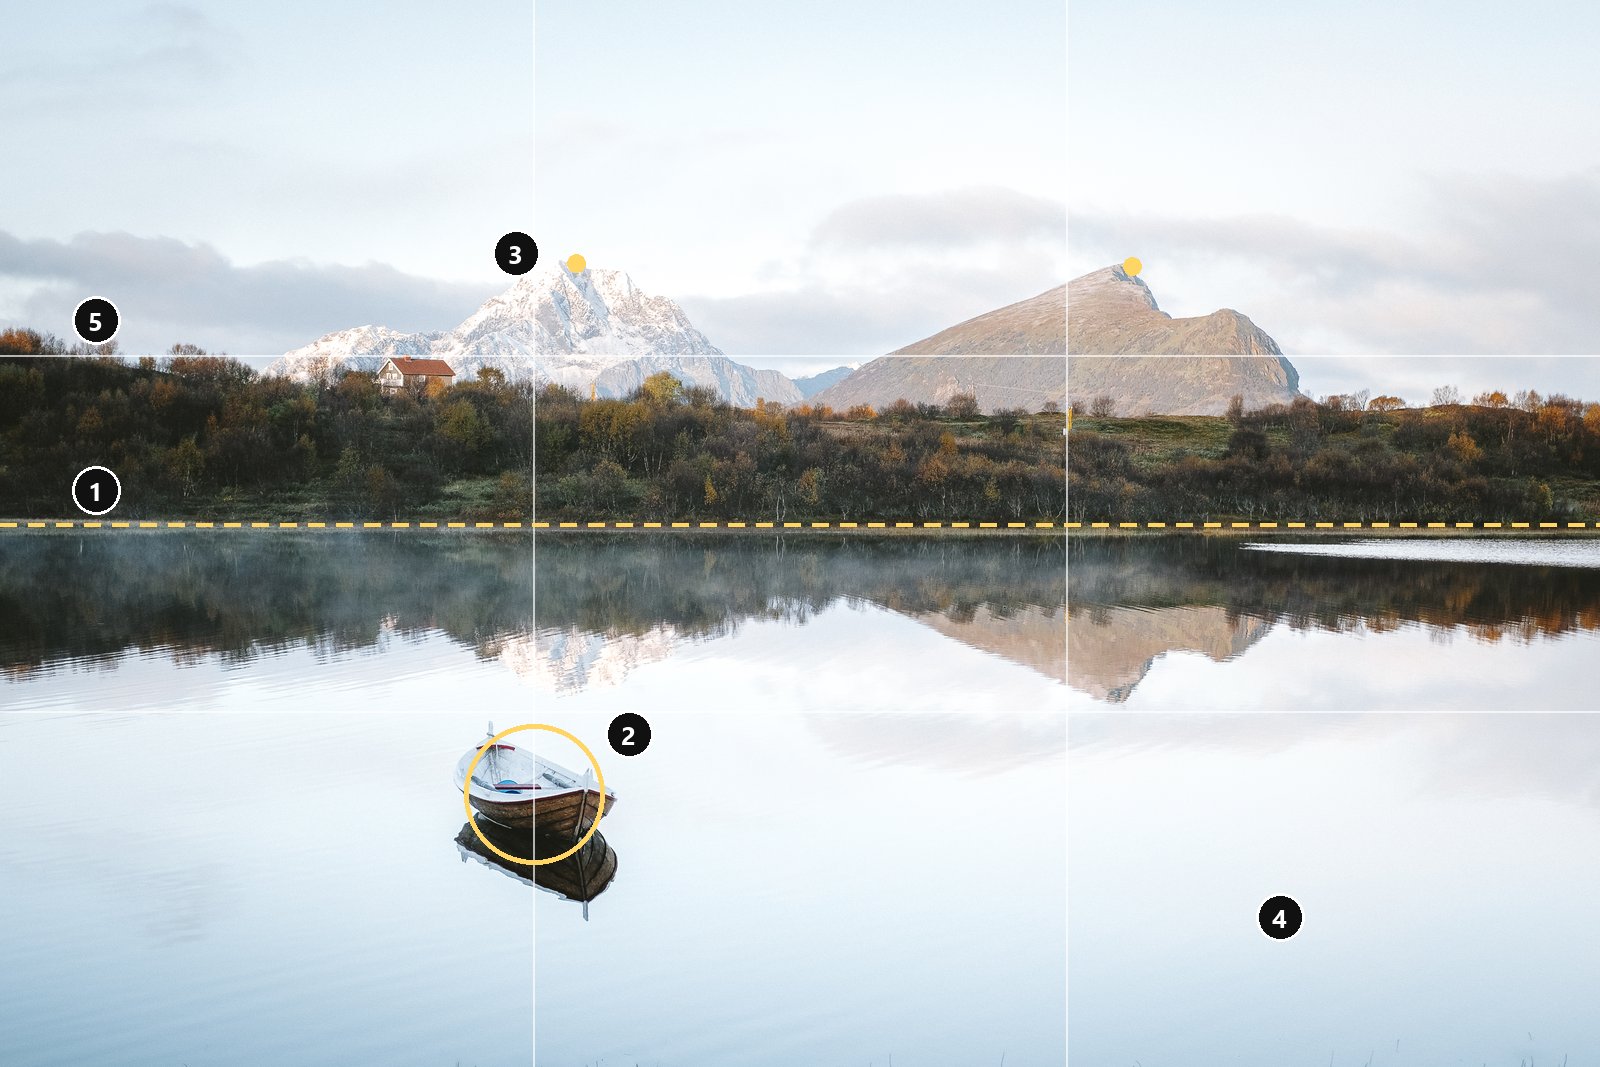
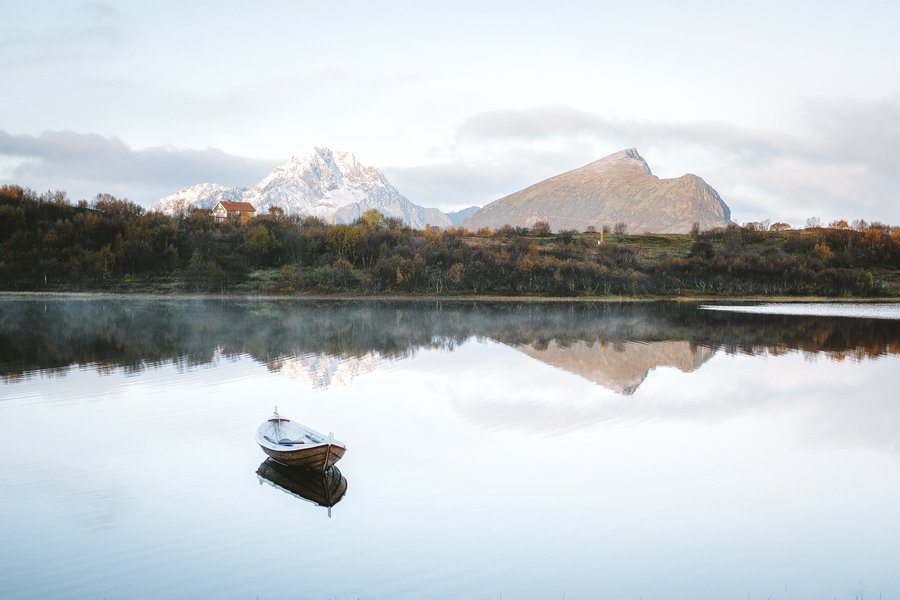
- 1 · Mirror axis — the shoreline sits almost exactly in the middle of the frame. This deliberately breaks the rule of thirds: with a perfect reflection, symmetry is the stronger story.
- 2 · The main subject — the boat sits on the left third line, just below the lower third. It's small, but it's the only sharp, contrasty object in the calm water, so the eye always finds it.
- 3 · Balance — the two peaks fall roughly on the two vertical third lines. The white, snowy peak and the warm, brown mountain balance each other in shape and colour, while the small house gives a sense of scale.
- 4 · Negative space — the empty water on the right gives the boat room to breathe and adds to the quiet mood.
- 5 · Layers — water, birch forest, mountains, sky: four clear layers give depth to a flat scene.
The crop
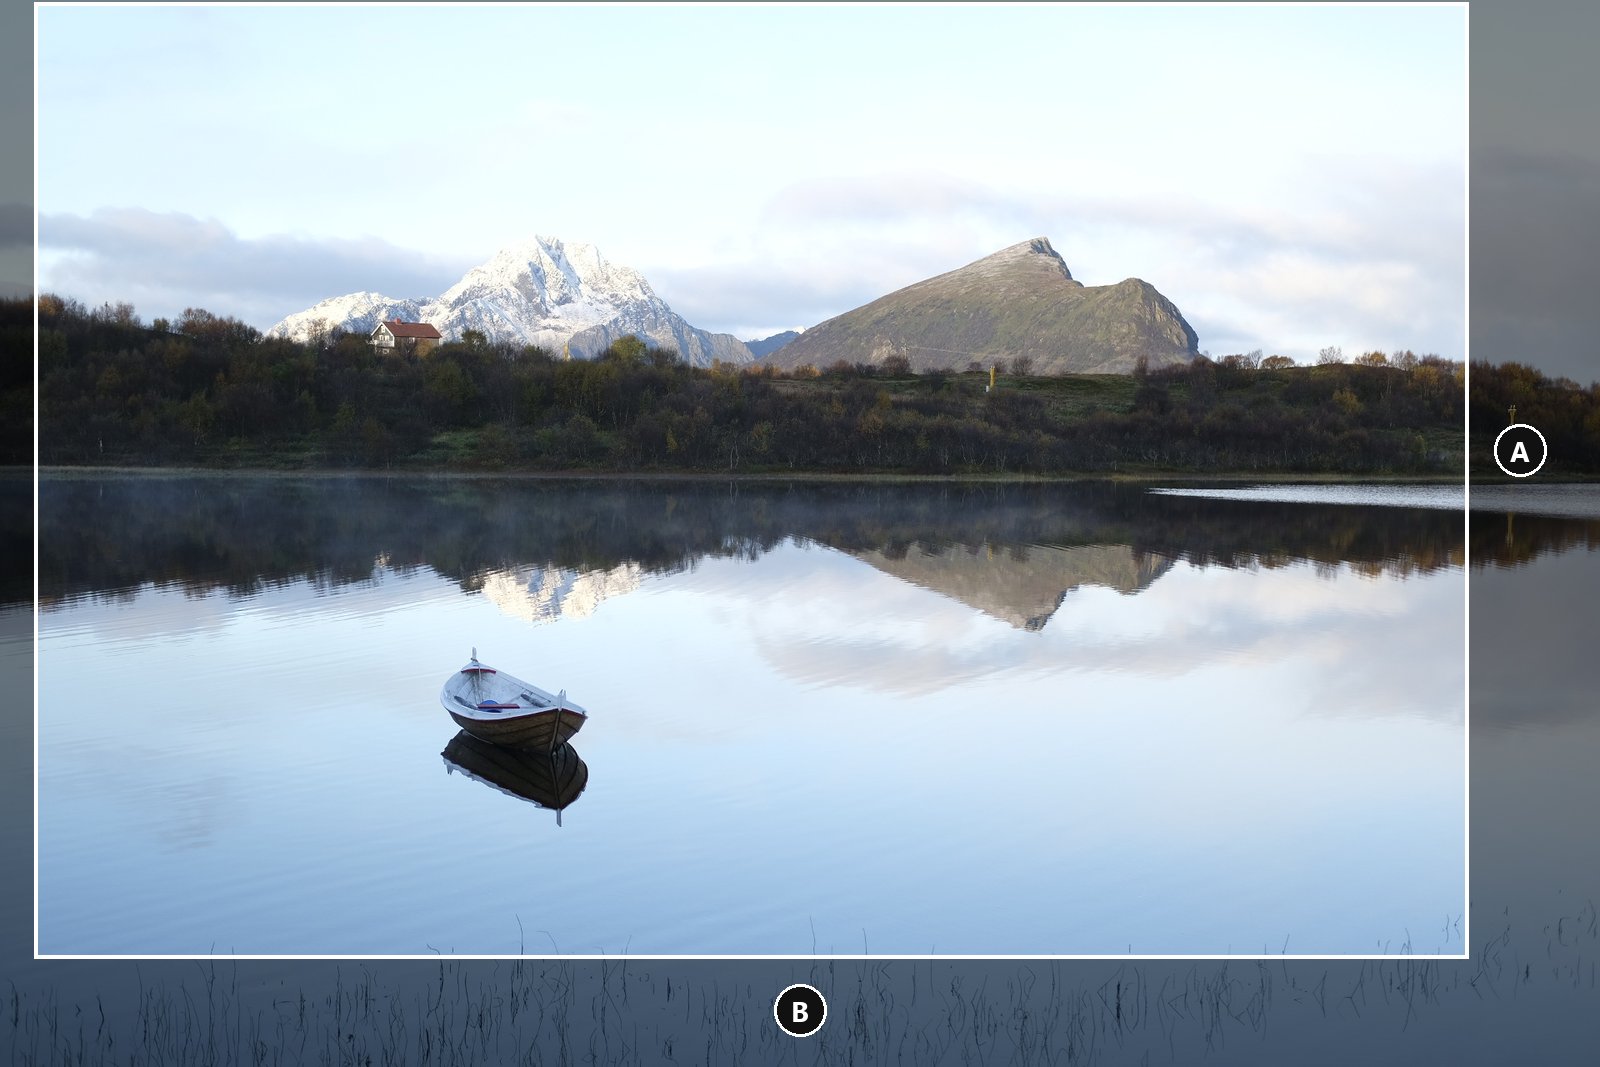
I kept the original 3:2 ratio but cropped to about 90% of the frame. Removing the reeds and the marker post cleans up the edges, and the boat becomes a little bigger and more important in the picture.
Light and tones

- Lifted shadows: the darkest tones start at about 28 instead of 0 — a soft, matte look instead of hard black.
- Bright midtones: a mid-grey of 128 becomes about 176. This is what gives the photo its airy, high-key feel.
- Protected sky: the sky stays just below pure white, so the clouds keep their shape. Only the brightest sunlit snow on the peak touches the top.
- Overall the picture became about 9% brighter with noticeably lower contrast — fitting for a misty morning.
Colour grading
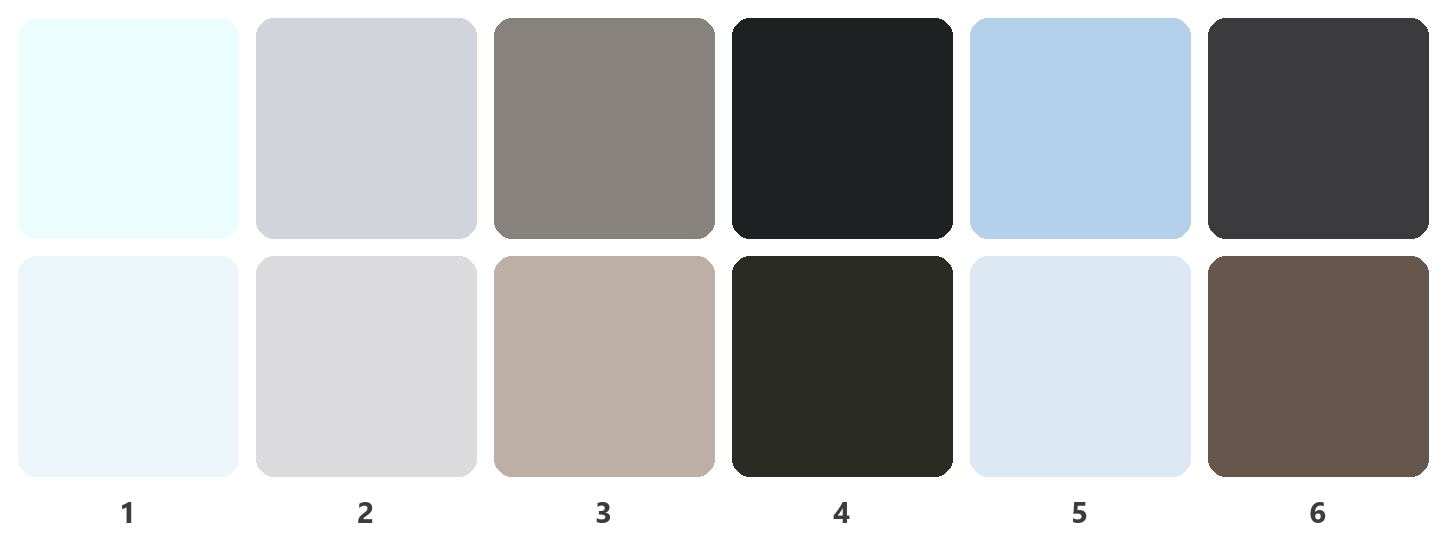
- 1 · Sky — the cyan cast became a pale, cool blue, and the clouds are back.
- 2 · Snowy peak — brighter and slightly cooler, with a faint hint of lavender.
- 3 · Right-hand mountain — from grey-green to a warm, rosy brown. This is the biggest change: the morning glow on the mountain was emphasised.
- 4 · Birch forest — from bluish black to warm olive, bringing out the autumn colours.
- 5 · Water — much less saturated: deep blue became pale, misty blue.
- 6 · Boat — from grey to warm wooden brown, so the main subject stands out from the cold water.
The overall saturation dropped by more than a third, while the warm tones stayed or even got stronger. The curves show it too: in the shadows and midtones the blue channel stays below the red one, so the shadows got a warm tint while the highlights stayed neutral. The result is a soft, pastel palette with a few warm accents.
The actual settings
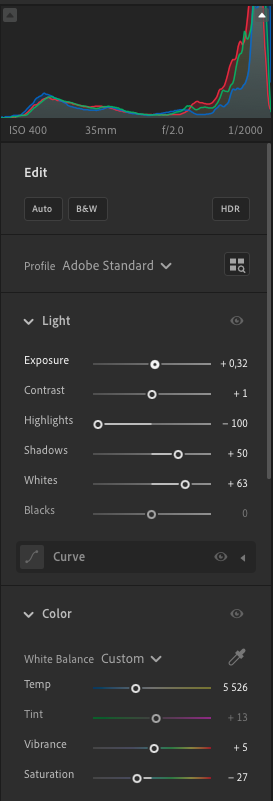
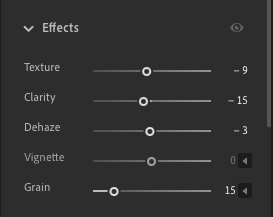
The global settings in Lightroom: Light, Color and Effects panels.
- Profile: Adobe Standard — a neutral starting point instead of the camera's own film simulation. That's why the 'before' image looks different.
- Exposure +0.32 — a little brighter overall; contrast +1 is practically untouched.
- Highlights −100 and Whites +63 — the key pair: Highlights holds back the bright sky and snow, Whites sets a high white point. The result is bright and airy, but not blown out.
- Shadows +50, Blacks 0 — opens up the dark birch forest and the boat; this is where the soft, matte look comes from.
- White balance 5526 K, Tint +13 — slightly warm with a touch of magenta. That explains the rosy mountain and the lavender hint in the snow.
- Vibrance +5, Saturation −27 — the muted, pastel palette. The small Vibrance boost keeps the weaker colours from going completely grey.
- Texture −9, Clarity −15, Dehaze −3 — less micro-contrast for a softer, dreamy look that matches the mist.
- Grain 15 — a fine film grain, mostly visible in print and at full resolution.
The screenshots show only the global sliders. The darker sky, the snowy peak, the warm glow on the mountain, the boat and the darker water at the bottom were done with local masks on top of these.
The process, step by step
- Starting point and crop
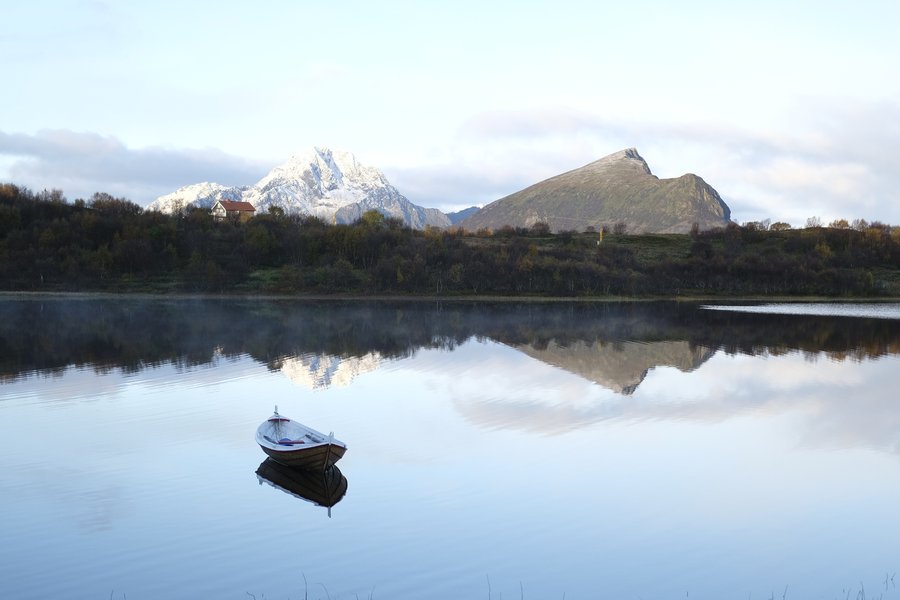
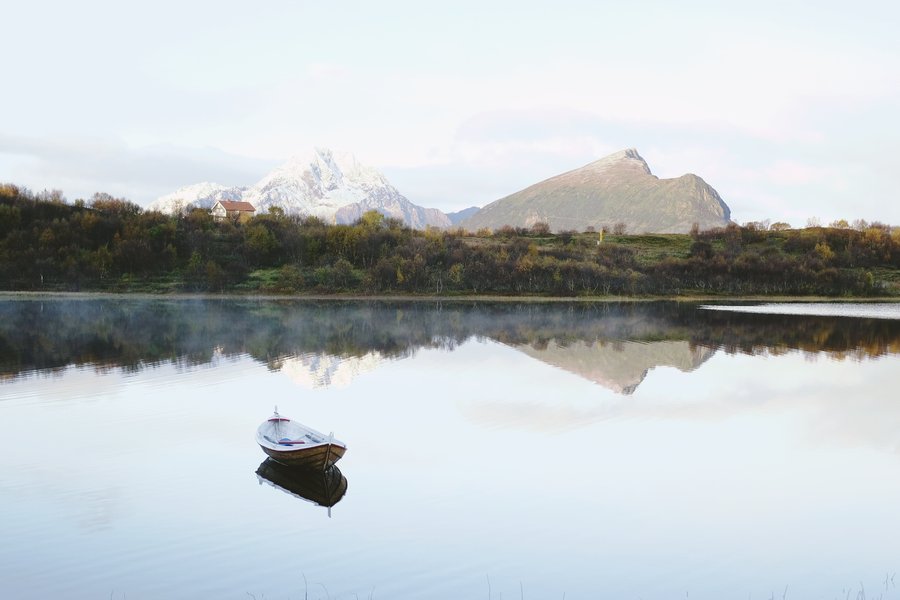
The camera's own rendering, cropped. Cold, blue and a little dark in the shadows.
- Tones only
Only the brightness curve applied. The picture opens up, but it stays cold and blue — brightness alone isn't enough.
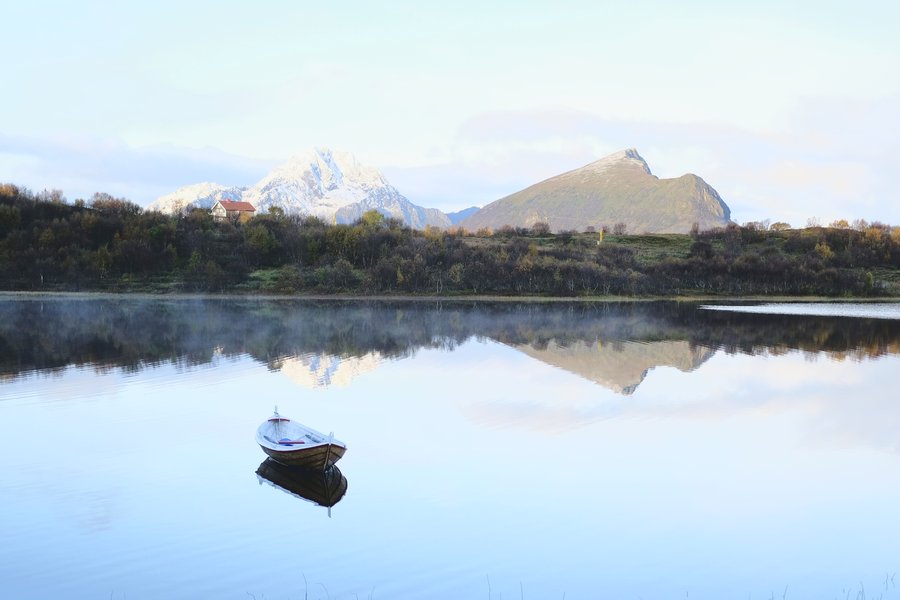
- Global colour
White balance and the colour-channel curves. The blue cast disappears, the shadows warm up and the autumn colours appear.
- Local adjustments
Masks for the details: a darker sky with the clouds brought back, a brighter snowy peak, the warm glow and extra texture on the right-hand mountain, a brighter and warmer boat, and gently darkened water at the bottom of the frame. This is the final image.
Takeaways
- Calm mornings are worth the early alarm — mist and a mirror-like lake only happen in still air.
- With a strong reflection, a centred horizon can work better than the rule of thirds.
- Crop out small distractions at the edges: they pull the eye out of the picture.
- First fix the tones, then the colours, and only then the details with local adjustments.
- A muted palette with one or two warm accents keeps a calm scene calm, but not boring.
Note: the slider values come from Lightroom. The curves, colours and step images were made by comparing the starting image and the finished photo pixel by pixel, so they show the overall effect of the edit, not individual sliders.